A Guide On How to Make Your Own Kokedama
There are always new plant trends sprouting up in the gardening community, and the latest one is something that has been around for a long time. The ancient Japanese technique of creating Kokedama is having its time in the spotlight, with gardening enthusiasts taking a turn at this simple DIY technique.
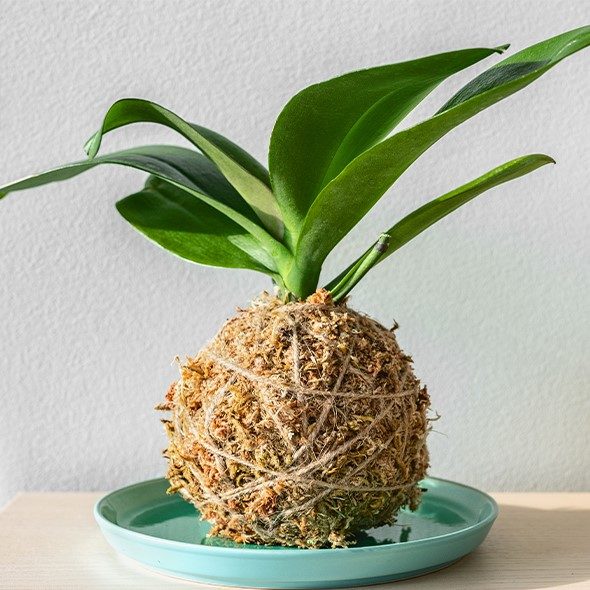
Kokedamas, or Japanese Moss Balls, are a unique and eye-catching plant that can enrich any space, including lounge rooms, offices, kitchens, bathrooms, or backyards. To help create and care for your Kokedama, we have put together a helpful guide with all the need-to-know information.
What are the best plants to use in my Kokedama?
One of the great things about Kokedama is that there is a huge selection of plants you can choose from to use. However, the plants that you choose must have a few key characteristics for them to work with this kind of unique gardening method.
Key characteristics:
- Hardy
- Stay small
- Slow growing
- Be tolerant to less ideal growing conditions
Best plants to use for Kokedama:
- Cebu Blue Pothos
- Chinese Money Plant
- Dwarf ZZ Plant
- Ivy Peperomia
- Ficus tree Bonsai
- Spider Plant
- Nerve Plant
- Pineapple Mint
- Rabbit Foot Fern
- Bird’s Nest Fern
- Waffle Plant
- Rex Begonia
What do I need to make a Kokedama?
Making Kokedama is an easy DIY project that lets you get your hands dirty. It only takes a few items to make, and the best thing is that you probably already have most of them in your garden supplies.
What you need:
- Peat Moss soil
- Bonsai soil
- Fresh sheet moss or Sphagnum moss (you can not use preserved moss because it is dyed)
- A small fresh plant of your choosing
- Watering Can
- Water
- Wire, twine, or string (this is for both practical and decorative use)
How do you make a Kokedama?
Making your own Kokedama is a pretty easy process, but like all good gardening, you must be ready to get your hands dirty. Follow our simple steps below to make your own Kokedama.
Step 1:
Take one scoop of peat moss soil and one scoop of bonsai soil and mix them together. Exact measurements are not necessary as the size of your ball will depend on the size of your plant roots. If you think your ball needs to be bigger, continue adding equal parts of both soil mixtures.
Step 2:
Take your watering can and water your soil mixture, so it becomes moist and is easy to stick together.
Step 3:
After your soil is wet, start taking clumps and sticking them together to form a ball. Again, the size of your ball will depend on your plant. Keep in mind that all your plant roots must be covered by the soil ball with none overhanging. To make sure this doesn’t happen try to make the ball 2 – 3cm bigger from where your roots end.
Step 4:
Your ball should be able to hold itself together without your assistance. The one thing you want to avoid is your ball crumbling and falling apart. To test the strength of your ball, chuck it in the air and catch it with your hands. If the ball crumbles this means your soil is too dry. Continue to add more water to your ball until it passes the test.
Step 5:
Take your small plant out of its nursery pot and brush all the excess soil from the roots so they are exposed.
Step 6:
Take your soil ball and break it into two halves. Place the roots of your small plant on one half of the soil ball and then sandwich the two halves back together. Squeeze the ball until the two halves are solid again. You may have to add a little bit more soil and water to make it round again.
Step 7:
Then take your sheet moss or Sphagnum moss and swaddle your soil ball so that all the sides are covered.
Step 8:
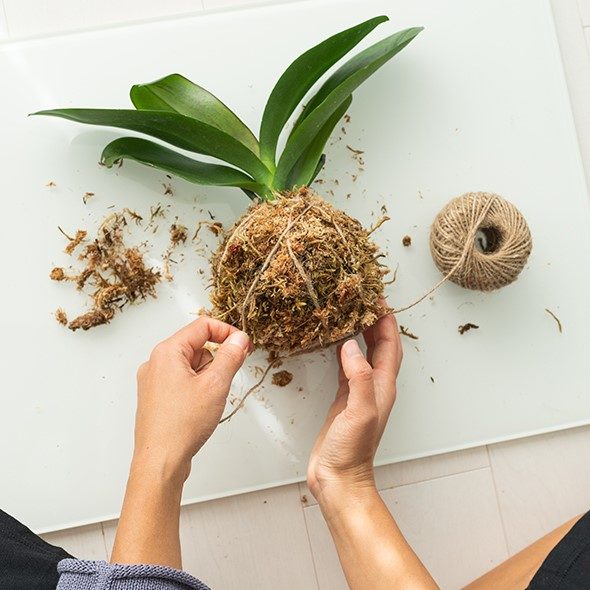
Using your wire, twine, or sting, start at the base of the plant and tie a loop around it. Do not strangle the plant or go through the centre of the plant as this could damage it.
Step 9:
While keeping the twine tight, start wrapping the twine around the ball so that the sheet moss becomes secure. The pattern you wrap it in is up to you, sometimes the most random designs look the best. Be assured that this wrapping technique will not threaten or damage your plant’s roots.
Step 10:
When you are done wrapping, cut the end of the twine and tie it off so that it is connected to the other wrapped twine. Your Kokedama ball is now ready to be displayed.
Where is the best place to display my Kokedama?
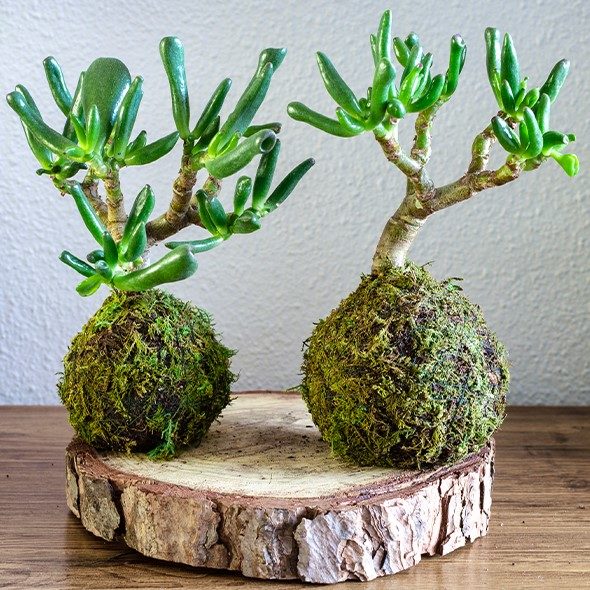
Because of their size, Kokedamas are easy to display in any setting of your house, office, or garden. For easy access to them, you can display them on a decorative tray or wood slice with some river pebbles surrounding it to give the look a finishing touch. Remember that Kokedamas are moist, so when displaying them always use a protective plate or sheet so your surface is not damaged. Another popular way to display your Kokedama is to add an extra loop of twine to your ball and hang it outside in your garden, kitchen, or bathroom.
Kokedamas are a fun DIY home gardening activity for all ages and are perfect for brightening up your home décor. If you don’t feel up to making your own Kokedama but are still interested in adding one to your garden, Koch & Co sell a range of artificial Kokedama balls. These are available now via our website. For more information on how to care for your Kokedama, read our helpful Kokedama FAQ page.
The post A Guide On How to Make Your Own Kokedama appeared first on Koch & Co Blog.


