Glue Gun Buying Guide
Summary:
- Making your own bomboniere packaging is often more cost-effective than outsourcing bomboniere packaging.
- Benefits of DIY packaging include flexibility of customisation to match event themes, as well as personalisation, and uniqueness of design.
- Guests appreciate the effort put into DIY packaging and often keep these gifts as sentimental keepsakes.
When preparing wedding favours, party favours, crafted event souvenirs, and more, making your own homemade party favours packaging can be a great way to make creative and personalised gifts that don’t cost the earth.
Whether you’re planning a wedding, a baby shower, a birthday bash, or any special event, we’ve put together a range of helpful DIY favour packaging ideas and tutorials below to help you craft the perfect creative bomboniere packaging that reflects your personal style.
Benefits of DIYing Your Bomboniere Packaging:
- Customisable favours packaging: DIY bomboniere packaging allows you to tailor the design, colours, and materials to match your event theme and personal style.
- Budget-friendly party favours packaging: Crafting your own packaging can be cost-effective compared to purchasing pre-made options. When crafting your own packaging, you have the option to choose materials that align with your budget.
- Personalised party favours Packaging: There are different options for DIY inclusion of the names of the couple, event date, or the intended recipient.
- Creative favours packaging: For those with more unique favour ideas, handmade packaging provides an opportunity for experimentation and self-expression.
- Appreciative Guests: Guests often appreciate the effort and thought that goes into DIY bomboniere packaging. They are often more likely to keep or reuse handcrafted ‘thank you’ gift packaging that has sentimental value.
DIY Bomboniere Packaging Inspiration:
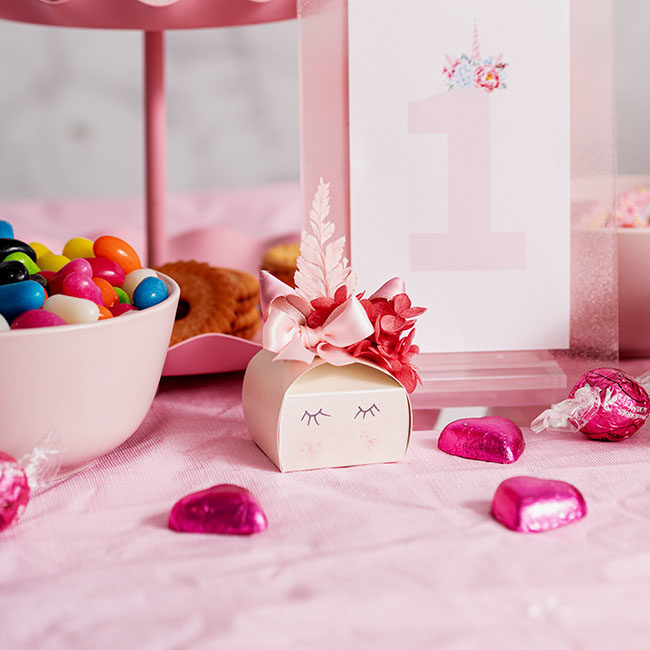
Pretty Pink Unicorn Bomboniere Packaging
Best used for: baby showers, 1st birthdays, children’s birthdays, baptisms, and gender reveals.
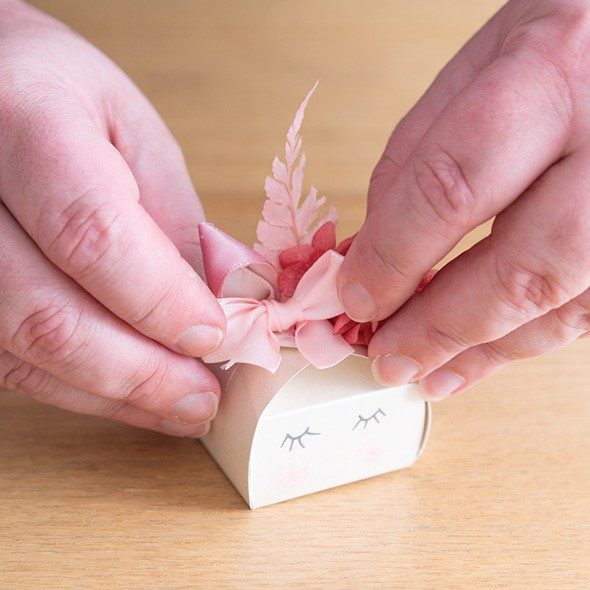
This unicorn bomboniere is a simple DIY project that will delight your guests. With some simple illustrations, dried flowers, and some ribbon, you can transform our bomboniere petite box to match your sweet event theme.
How to Create:
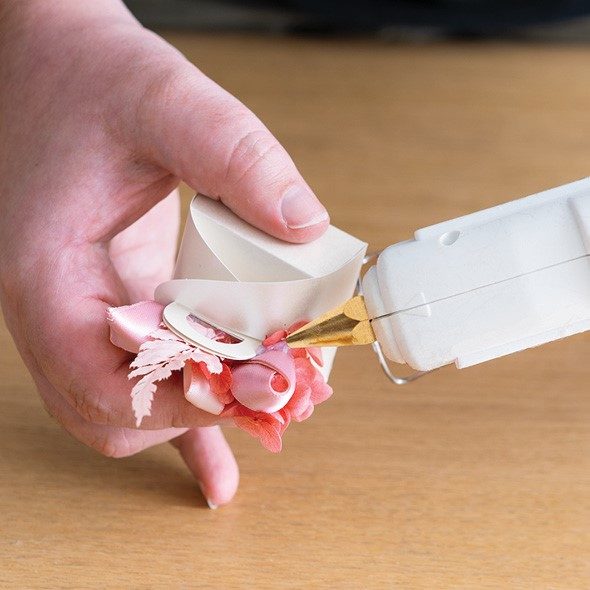
After drawing a face on your box and allowing it to dry, assemble your box and insert the party favour gift. Close the bomboniere box. Next, tie two small bows, with the larger bow measuring approximately as wide as your bomboniere box. Using a hot glue gun, attach a leatherleaf fern so that it comes to a point, like a unicorn horn. Anchor the horn with the larger bow. Then, attach a small sprig of preserved hydrangea and glue on an angle, with the smaller bow sitting beside it.
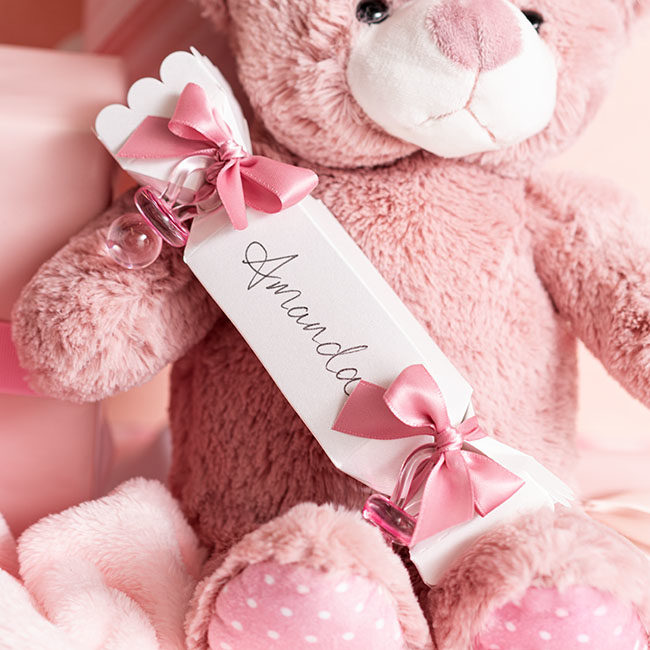
Baby Bonbon Pink Bomboniere Packaging
Best used for: baby showers, 1st birthdays, children’s birthdays, baptisms, and gender reveals.
This bonbon bomboniere is a simple DIY project that is super easy to put together. With some artistic penmanship, acrylic charms, and some ribbon, our bomboniere bonbon box packaging shines with personalised sentiment.
How to Create:
After writing a recipient’s name on your box and allowing it to dry, assemble your box and then insert the party favour gift. Close the bomboniere box. Then, secure each end of the bonbon with small bows in complementary colours. Take care to attach your charms while tying these bows.
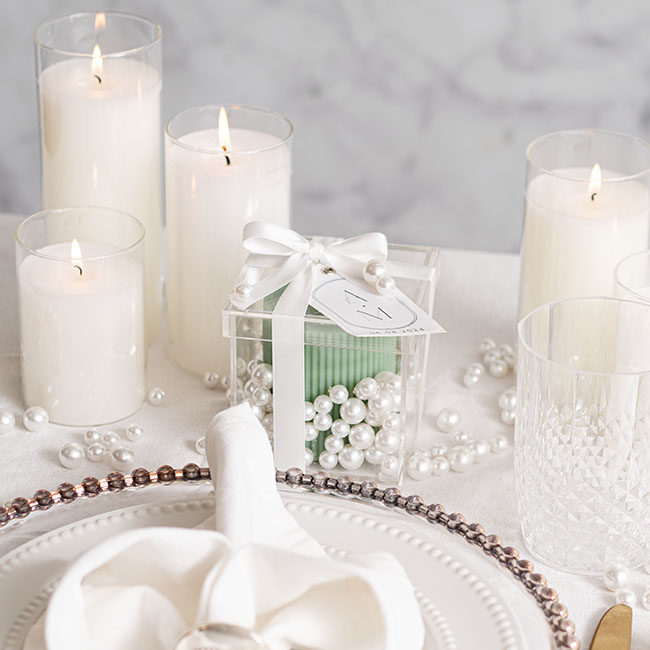
Clear Acrylic Display Bomboniere Packaging
Best used for: weddings, engagement parties, communions, kitchen teas, bridal showers, and baptisms.
This clear acrylic bomboniere is a very simple DIY project that beautifully displays the gift inside. With a gift tag, some acrylic pearls, and some ribbon, you can enjoy the simple elegance of our acrylic gift box packaging.
How to Create:
After writing a recipient’s name on your gift tag and allowing it to dry, place your gift inside your box and then sprinkle in some acrylic pearls. Close the bomboniere box. Secure with a decorative bow. Take care to attach your gift tag while tying this bow.
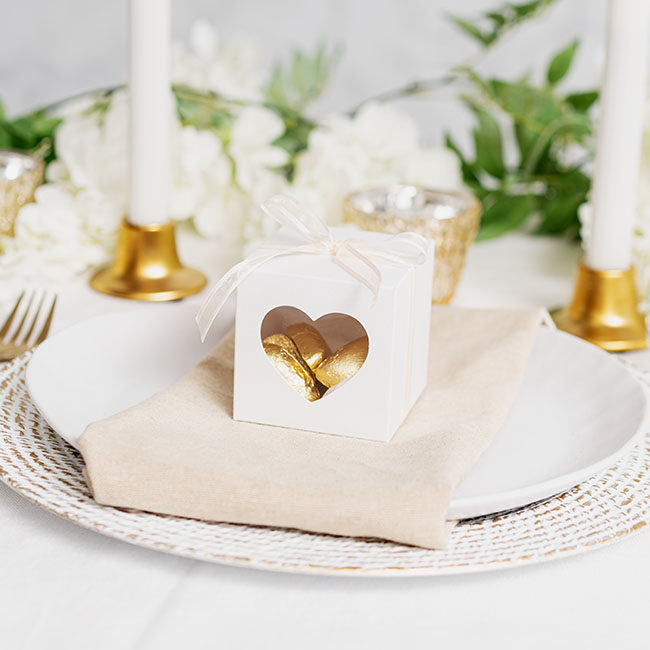
Heart Window Box Bomboniere Packaging
Best used for: weddings, engagement parties, kitchen teas, bridal showers, communions, and baptisms.
This cardboard bomboniere with a heart-shaped PVC window is a very simple DIY project that offers a sneak peek of the gift inside. With some confetti filling and some ribbon, our acrylic bomboniere heart window box packaging offers a simple memento of a romantic day.
How to Create:
Assemble your box, insert the party favour gift, and sprinkle in some confetti. Close the bomboniere box. Finally, secure with a decorative bow.
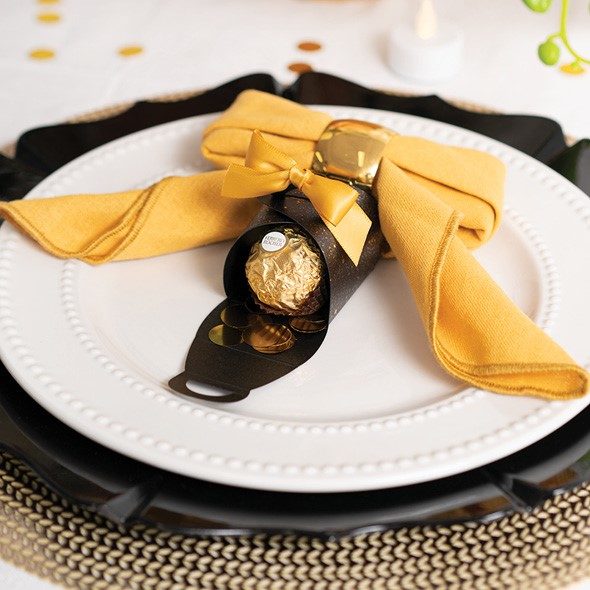
Terrazzo Speckled Bomboniere Packaging
Best used for: weddings, engagement parties, milestone birthdays, and New Year parties.
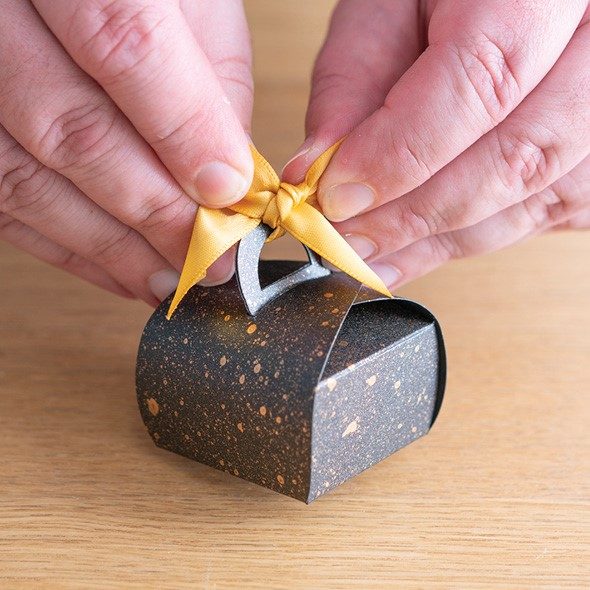
This cardboard bomboniere is decorated with speckles of paint for a highly impactful DIY project. With some spray paint, confetti filling and some ribbon, you too can transform our petite box bomboniere packaging into a uniquely texturised and snazzy gift.
How to Create:
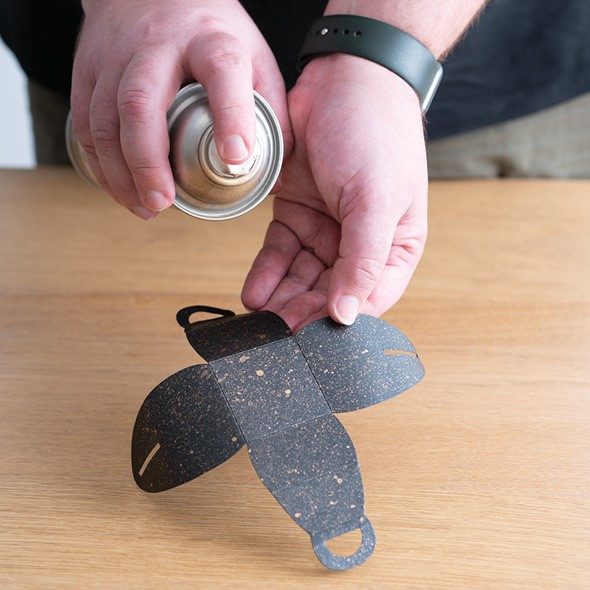
Lay your bomboniere boxes with the exterior surface facing up on a paintable surface. After shaking your spray paint, press down on the nozzle lightly and spray from a distance onto your boxes for speckled coverage. Once dry, assemble your boxes, insert party favour gifts, and sprinkle in some confetti. Close the bomboniere boxes. Finally, secure with decorative bows.
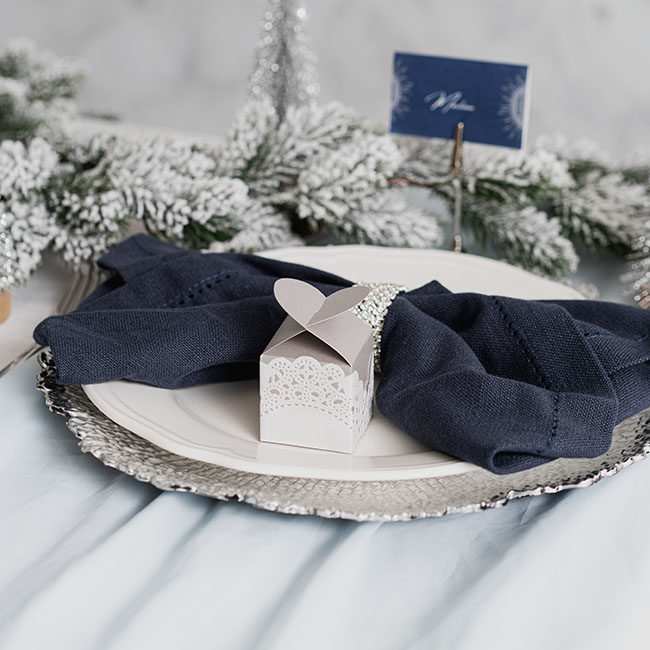
White Lace Bomboniere Packaging
Best used for: weddings, engagement parties, kitchen teas, and bridal showers.
This pearlescent cardboard bomboniere with a lacy border is a delicate and Elegant DIY Favours packaging project. With the help of only a small paper doily, our modern box bomboniere packaging is elevated with the power of detailing.
How to Create:
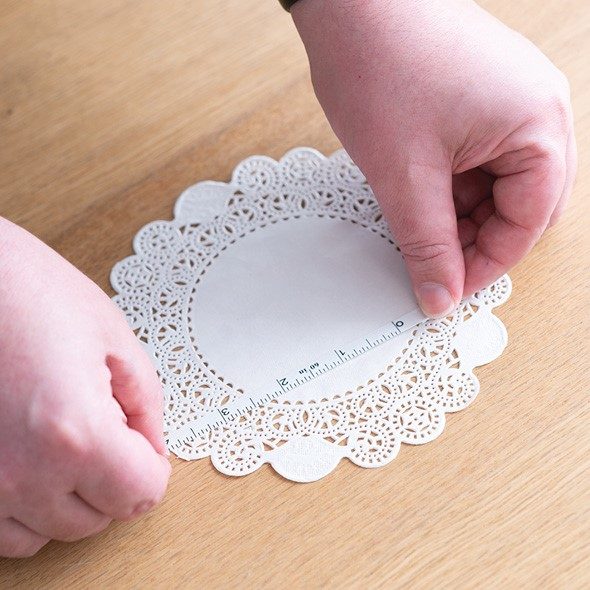
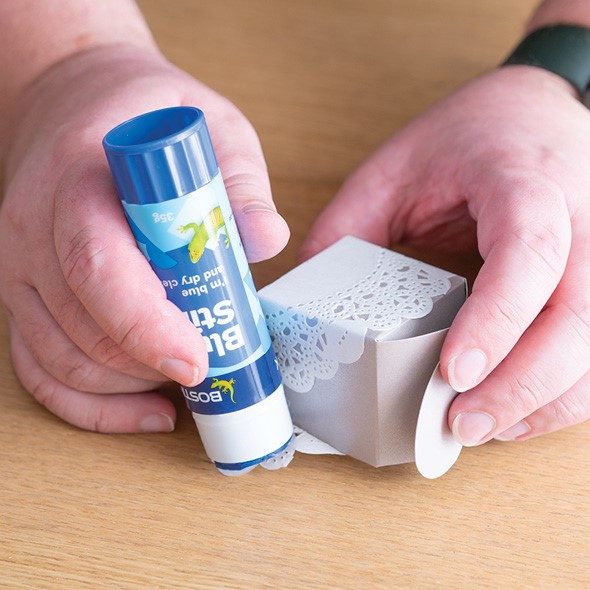
Assemble your bomboniere box. Your paper doily should measure approximately 135mm in diameter. Cut a semicircle out of your doily that measures 45mm at its tallest point. The outer curved edge of the doily needs to be the ‘arch’ in your semicircle. Repeat this process, as you will need two semicircles per bomboniere box. Using a gluestick, glue on one semicircle at a time, with the tallest point of the semicircle sitting at the centre of the bomboniere box’s panel. Next, wrap the edges onto the side panels of the box. Take care to glue down your doily securely. Repeat this process with your second doily semicircle on the opposite side.
With this DIY guide as a source of party favour inspiration and using our wide range of bomboniere boxes, jars, and bags as a convenient and cost-effective springboard for your DIY bomboniere packaging, we hope you and your guests enjoy the sentimental value of handmade bombonieres.
For more information about bomboniere packaging, read our Bomboniere Packaging Buying Guide and our blog All You Need To Know About Bomboniere.
The post How To DIY Bomboniere Packaging For Your Next Event appeared first on Koch & Co Blog.
