Paper Flower Craft Project: Floral Garland
Paper Floral Garland DIY
There’s something magical about delicate flower garlands made of paper. They’re the perfect DIY paper craft for personalising an event, creating your very own wedding photo background – or even as décor for a children’s room. Here’s a quick tutorial on everything you need to know to create your very own paper gift wrap craft masterpiece.
You’ll need
Five different coloured types of tissue paper or non-woven wrapping paper
Matching coloured bakers twine or string
Some branches to hang them from
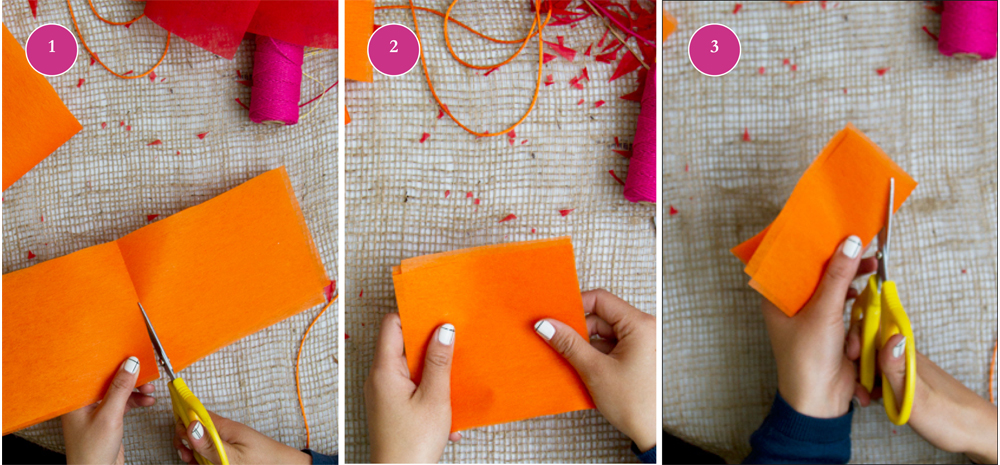
Step 1 & 2 To make your paper flowers, select your colour range – we used yellow, orange, red, pale and hot pink acid free tissue paper to create a fun vibrant colour palette. Pastel tints of the exact same colours would also be beautiful! First, take a sheet of paper and fold it until you have the right size (you can make smaller or larger flowers depending on your wish list!).
Tip: If you want more 3D “depth” to your flower, you can experiment with using more layers of paper. Just don’t get too carried away, or they’ll be too thick to manage and cut.
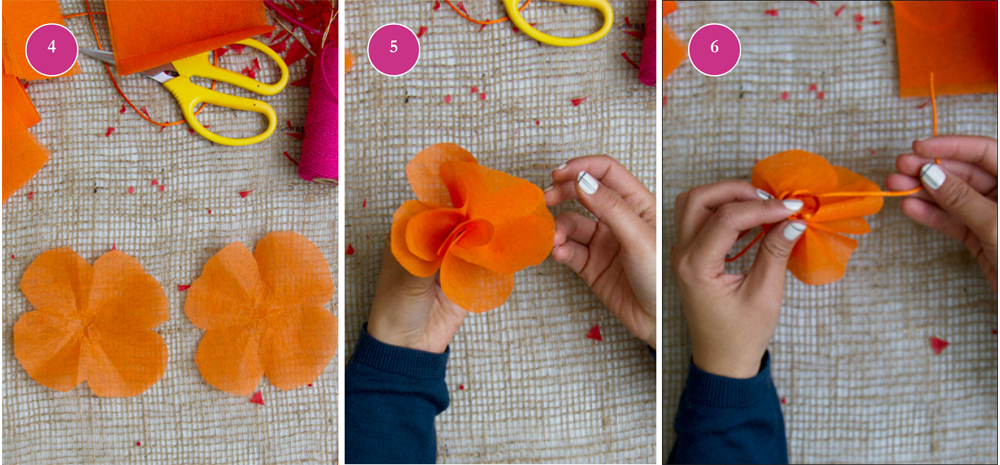
Step 3 Now cut your petal shape. We created three different flowers types for each colour by cutting the paper in different forms and shaping them slightly differently. In the orange tissue example shown here, we cut a four leaf clover shape. For the other petals we cut the tissue into a sharper point, creating more of a lily and chrysanthemum effect. Making different flower silhouettes creates more texture and interest in the final project.
Step 4 & 5 Now separate the two pieces of tissue and fan them slightly, so the petals are no longer sitting on top of each other, but overlapping. Pinch the centre of both of them to create a short stem, and twist the tissue gently so it’s now easy to tie with twine.
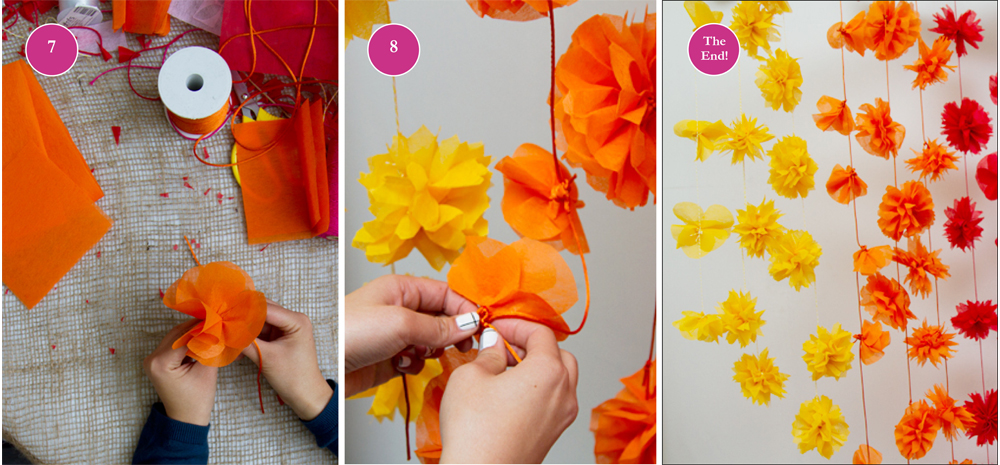
Step 6 & 7 Tie each individual paper flower to a length of string, tying the string around the “stem” you’ve just created. Use a string that matches the tissue colour. Shape the flower until you’re happy with the final look.
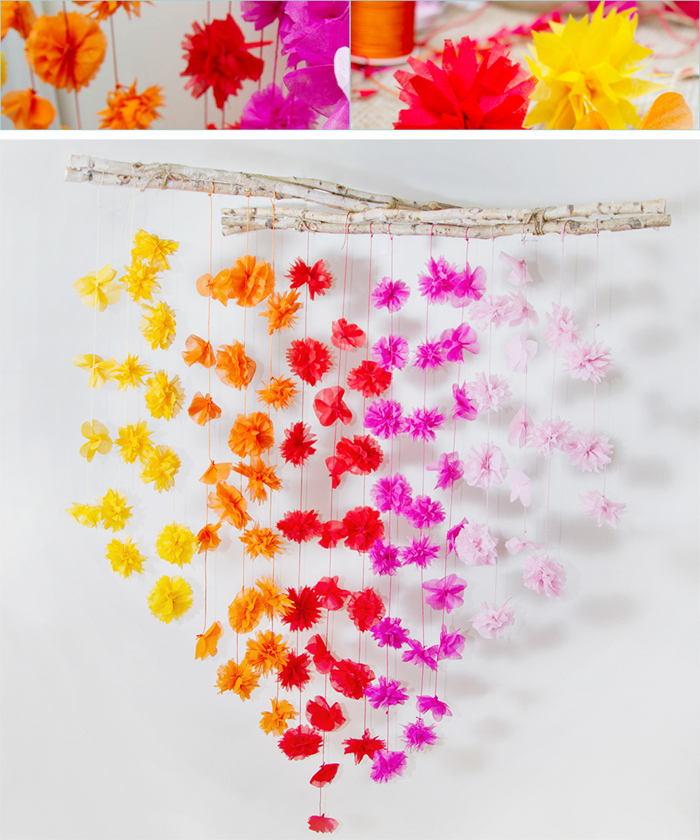
Step 8. Your individual tissue flower garland is now complete. Repeat until you have enough strands to create a display – we made sixteen garlands. To create an interesting and sturdy piece that was wide enough to hold all sixteen garlands, we tied branches together to create two separate pieces to hang the garlands from. Now tie each garland string to your branch, willow or bamboo stick, playing with the lengths to create an arc or shape. If you were really precise with this you could create a heart – perfect for a wedding!
Inspired? Sydneysiders can get involved in the Craft Party action as part of Vivid Ideas this Saturday 6 June where Etsy will be hosting a celebration (midday to 11pm) complete with music, markets and, of course, plenty of paper craft materials so visitors can unleash their creativity with activities to suit any age or skill.
For more craft and DIY ideas, take a look through our gift packaging and event decoration products. We have everything from tissue paper and gift bags, to helium balloons!
The post Paper Flower Craft Project: Floral Garland appeared first on Koch & Co Blog.


