The Beginner's Guide to Ribbons
Now that you are probably an expert at making a Christmas pom pom, we hope you’re ready for a second beginner’s guide to tying a ribbon – this time, a basic flat bow. Practise makes perfect, so don’t be afraid to keep trying till you tie the perfect bow. Ribbons and bows are beautiful additions to any gift and will enhance the overall look of your gift wrapping.
Prepare your gift so the ribbon sits flat on the bottom
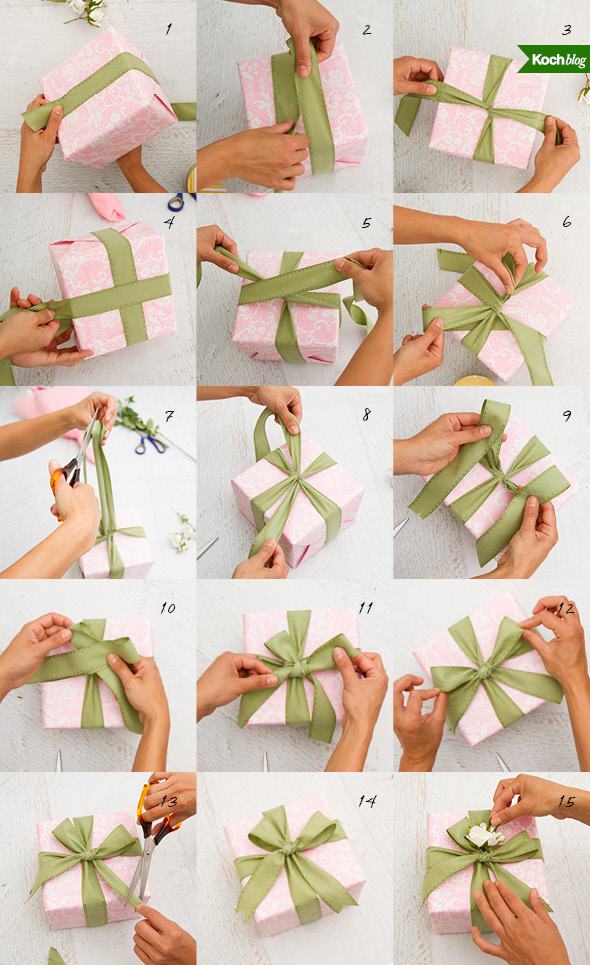
1/ Start with your gift right side up. Take one end of the ribbon and wrap around the gift so it meets back at the top. (Image 1-2)
2/ Twist the ribbon across each other to make a thin cross. (Image 3)
3/ Wrap one end of the ribbon around the gift again so it meets back to the top. This forms the flat cross on the bottom. (Image 4)
4/ Back on the top, thread one end of the ribbon over and under the thin cross. (Image 5-6)
5/ Cut ribbon around 30cm away from the gift. Now you are ready to tie the perfect bow. (Image 7-8)
How to tie a perfect bow
1/ At the center of the ribbon, form two evenly sized loops in each hand, creating a bunny ear shape. (Image 1)
2/ Take the left loop and cross it over the right one. (Image 2)
3/ Fold the left loop behind the right and thread it back through the center. Adjust the length of each loop to suit and then pull both loops to tighten the knot. (Image 3)
4/ To finish, pinch the ends of the ribbon and cut on an angle for a neat v-shape. (Image 4)
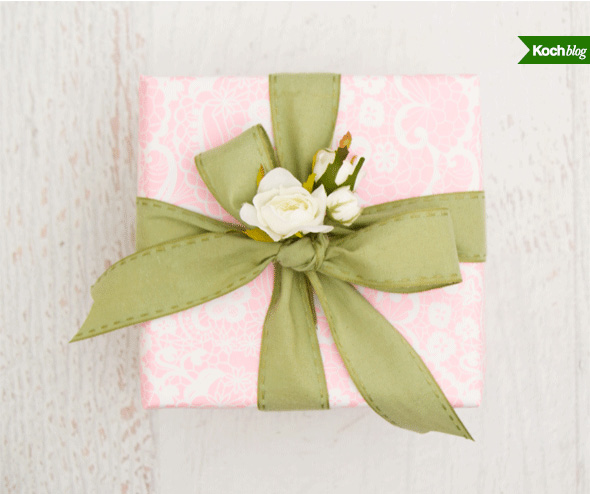
Optional decoration: slip a small, short stemmed flower under the center of the ribbon for an extra pretty touch to your perfect bow. (Image 6)
Once you incorporate this knowledge into styling your gift packaging, you’ll be on your way to impress!
The post How To Tie A Perfect Bow appeared first on Koch & Co Blog.

